In a previous post I wrote about my interpretation of how to structure a multiple module Android app with clean architecture, without going into detail about how you actually put it into practice. In this post I will show a real example of using that architecture, what goes into each layer, and how to communicate between the layers.
The demo app
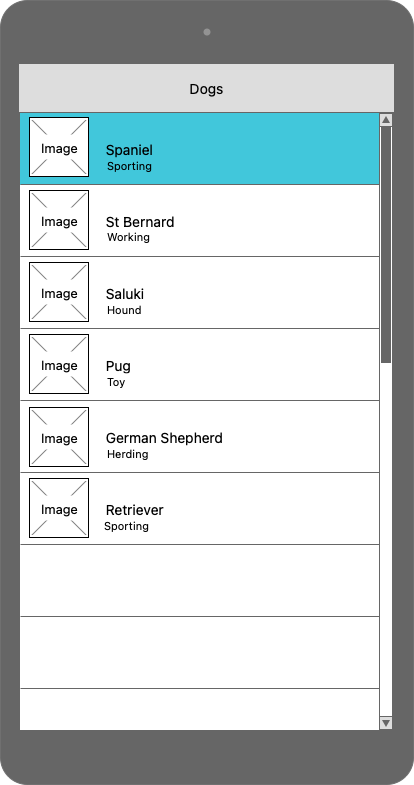
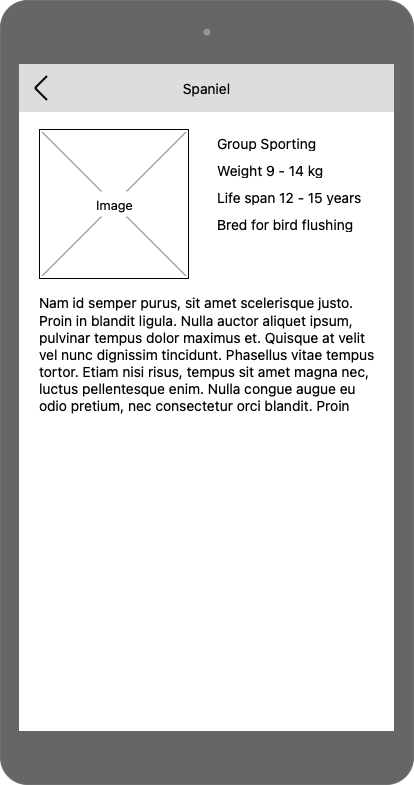
In order to demonstrate this I’ll be developing a simple app with just two screens – a list screen and a details screen. Rather than use the usual GitHub api or HackerNews api, I’ll be using TheDogAPI; I find it a bit more interesting and it makes me feel like I’m actually getting away from work for a few hours.
I’ll also be using the usual Android technologies such as AAC, Retrofit, Gson, Koin, and a few others that are all fairly standard and don’t need any explanation.
This app doesn’t use feature modules, dynamic feature modules, instant app feature modules, or any other fancy stuff like that, I’ll save that for another day. Also note that the app won’t win any design awards, the UI is very basic. Here are the wireframes for the app.
Setting up the project
The first thing to do is create the app structure in Android Studio with the four modules for the app – app, presentation, domain, and data, as detailed in the previous post. As a slight improvement to that project structure, move the colors.xml file from the app module’s resource folder into the presentation module’s resource folder. Because the app module has a dependency to the presentation module the app styles or themes can use the colours from there and it keeps all the colours in one logical place.
Another good practice is to keep all the version information in the top level build.gradle file and then refer to these versions in all the module build.gradle files. That way when you need to update any versions you only need to do it in one place. You can do this by adding something like the following to the project’s build file in the buildscript section:
    ext {
        compile_sdk = 30
        min_sdk = 26
        target_sdk = 30

        kotlin_version = "1.4.31"

        junit_version = "4.13.2"
    }
Then in the module level build files you can refer to the versions like this:
android {
    compileSdkVersion compile_sdk

    defaultConfig {
        minSdkVersion min_sdk
        targetSdkVersion target_sdk
    .
    .
}

dependencies {
    .
    .
    testImplementation "junit:junit:$junit_version"
    .
    .
}
You can also remove the dependency for the Kotlin stdlib from all the module build files:
implementation "org.jetbrains.kotlin:kotlin-stdlib:$kotlin_version"
This is now added by default if you are using Kotlin 1.4+
Coding the app
You should now have an app that builds and runs with an empty MainActivty in the presentation module.
We’ll start by adding the framework for the Koin dependency injection. We’ll add the dependencies to the library in each module’s build file, and we’ll only add the necessary part of Koin for each module:
implementation "org.koin:koin-android:$koin_version" implementation "org.koin:koin-android:$koin_version"
implementation "org.koin:koin-androidx-viewmodel:$koin_version" implementation "org.koin:koin-core:$koin_version" implementation "org.koin:koin-core:$koin_version"Then we need a Koin module for the data, domain, and presentation modules by creating a new Kotlin file in each module with a val in it. For example, here’s the data module file:
import org.koin.dsl.module

val dataModule = module {
}
These Koin modules are empty for now, when we start adding some classes that need injecting we will be adding them in here.
Then we add the code in the app module Application class that will actually build the dependency injection graph:
class DoggosApp: Application() {

    override fun onCreate() {
        super.onCreate()

        startKoin {
            androidContext(this@DoggosApp)
            modules(
                listOf(dataModule, domainModule, presentationModule)
            )
        }
    }
}
And that’s the app module finished, now we’ll get on with the main functionality of the app.
Coding the domain layer
The domain layer is for business logic. It knows nothing about Android, networks, databases, etc., it lives in glorious isolation from the outside world. But it does know about business data models and what it wants, and it tells the other modules what it wants and what they can have.
There are basically three types of objects in the domain layer:
- Use cases – these are the business logic that the UI layer uses to get the data it needs
- Data models – these are the data classes in the format needed by the business
- Repository contracts – these are the contracts the data layer must conform to when the domain layer asks it for data
From the wire frames we can see we will need two data models – breed summary and breed details:
data class Breed(val id: Int, val name: String, val group: String, val imageUrl: String)data class BreedDetail(
val id: Int,
val name: String,
val group: String,
val imageUrl: String,
val temperament: String,
val bredFor: String,
val weight: SizePair,
val lifeSpan: SizePair
) {
data class SizePair(val lower: Float, val upper: Float)
}The UI layer will get this data from two use cases:
interface GetBreedsUseCase {
    suspend operator fun invoke(): List<Breed>
}

interface GetBreedDetailsUseCase {
    suspend operator fun invoke(name: String): BreedDetail
}
We want a repository to give us this data, we don’t care how or where from, just give us this data in the format we want it. So we create a contract that the data module must conform to:
interface DogRepository {

    suspend fun getBreeds(): List<Breed>

    suspend fun getBreedDetails(name: String): BreedDetail?
}
Use cases get their data from repositories or other use cases. The implementation of our use cases is very simple:
class GetBreedsUseCaseImpl(private val dogRepository: DogRepository): GetBreedsUseCase {
    override suspend fun invoke(): List<Breed> = dogRepository.getBreeds()
}

class GetBreedDetailsUseCaseImpl(private val dogRepository: DogRepository): GetBreedDetailsUseCase {
    override suspend fun invoke(name: String): BreedDetail = dogRepository.getBreedDetails(name)
}
Use cases are not always this simple, they can contain business logic. But often they are just one-liners like this that simply return whatever the repository gives us. You may think they are a waste of time when they are this simple, why not let the UI layer just use the repository interface directly? But they are actually serving a very useful purpose, they insulate the UI layer from any future changes to business logic, and maintain all business logic in one standard place. Also, the domain layer is a pure Java/Kotlin library so it is very simple to unit test any logic in here.
We’ll then need to tell Koin how to build the dependency injection graph. This is done by adding the following object creation calls to the domainModule.kt file.
val domainModule = module {

    single<GetBreedsUseCase> { GetBreedsUseCaseImpl(get()) }

    single<GetBreedDetailsUseCase> { GetBreedDetailsUseCaseImpl(get()) }
}
Coding the data layer
The main technologies I use in this layer these days are OkHttp, Retrofit, Apollo GraphQL, Gson, Room database, and Jetpack DataStore. These all support Kotlin coroutines and Kotlin Flow, which are my preferred ways of marshalling the data calls.
For this example we’re just using a simple Rest API and won’t be using any local database or in-memory caching, so we’ll just use OkHttp, Retrofit, and Gson. You can see in the linked git repo how the components for this are setup in their own object creation functions which are then injected from dataModule.kt:
val dataModule = module {

    single { createGson() }

    single { createGsonConverter(get()) }

    single { createOkHttpClient() }

    single<DogApi> { createRetrofit(get(), get(), BuildConfig.API_URL) }

    single<DogRepository> { DogRepositoryImpl(get()) }
}
The interesting parts of the data module are the parts that demonstrate how the separation of concerns between the modules are enforced. First, the repository implements the domain module’s repository interface to ensure it is providing data in the desired format:
class DogRepositoryImpl(
    private val dogApi: DogApi,
    private val breedMapper: Mapper<BreedDto, Breed>,
    private val breedDetailMapper: Mapper<BreedDetailDto, BreedDetail>
): DogRepository {

    override suspend fun getBreeds(): List<Breed> {
        return dogApi.getBreeds().map { breedDto ->
            breedMapper.map(breedDto)
        }
    }

    override suspend fun getBreedDetails(name: String): BreedDetail? {
        return dogApi.getBreedDetails(name)?.let { breedDetailDto ->
            breedDetailMapper.map(breedDetailDto)
        }
    }
}
The second interesting thing is the format of the data in the data module. As you can see in the repository code above, the data from the api is being mapped to the domain module’s data classes Breed and BreedDetail. This is because the data coming from the api is in the format specified by the api (i.e. Data Transfer Objects) which are not appropriate for the business model or UI layer. So we should always map the DTOs from apis, databases etc. into business models.
To me, mappers are a crucial part of the architecture. They are simple to write and maintain, and very importantly they are easy to unit test. I won’t go into detail on the mapper objects used in this example, check the git repository to see them.
The rest of the data layer for this example is just the Retrofit interface for the api.
Coding the presentation layer
All that’s left to do is get the data from the use cases to the view models and views. The use cases are injected into the view models as constructor parameters (using the use case interfaces) from the presentationModule injection file.
We can then call the use case invoke() function within the view model coroutine scope and assign the returned value to a LiveData object. The LiveData object is then observed from the Activity or Fragment.
class MainViewModel(private val getBreeds: GetBreedsUseCase): ViewModel() {

    private val _state = MutableLiveData<MainState>()
    val state: LiveData<MainState> = _state

    init {
        viewModelScope.launch {
            _state.value = MainState.BreedsList(getBreeds())
        }
    }

    sealed class MainState {
        data class BreedsList(val breeds: List<Breed>): MainState()
    }
}
class MainActivity : AppCompatActivity() {
private val viewModel by viewModel<MainViewModel>()
private lateinit var binding: ActivityMainBinding
override fun onCreate(savedInstanceState: Bundle?) {
super.onCreate(savedInstanceState)
binding = ActivityMainBinding.inflate(layoutInflater)
setContentView(binding.root)
viewModel.state.observe(this) { state ->
when (state) {
is MainState.BreedsList -> displayBreeds(state.breeds)
}
}
}
private fun displayBreeds(breeds: List<Breed>) {
}
}Using a LiveData object in your view model and observing it in the view completely decouples the view from the view model. It also makes them easier to test, which will be the subject of my next post about this architecture pattern.
You can see the full implementation of this example app in the GitHub repository.